


Earlier this year, a gentleman in Australia asked if I would be able to re-create a ring he lost. He had seen my Control-Alt-Delete and Esc statement rings. “Could I make a custom Esc ring in cast silver with a working mechanism?” I thought it would be an interesting challenge. I asked for a photo of what he had in mind and told him that I’d have to do some research. After some poking around on how keyboard keys actually work, I decided I would be able to do it. With prototyping and testing I’d probably have a working ring in a few weeks. I told him as much and he was good with this somewhat indefinite timeline. So my quest to create a working cast metal keyboard ring began!
One of the first things I did was look at old keyboard designs. The IBM Model M and F keyboard kept on appearing. It’s a 3 piece system which consists of a spring+hammer, a barrel, and a stem (which is the underside of the actual key). It’s a simple and robust design that makes a satisfying clickety clack when typing.
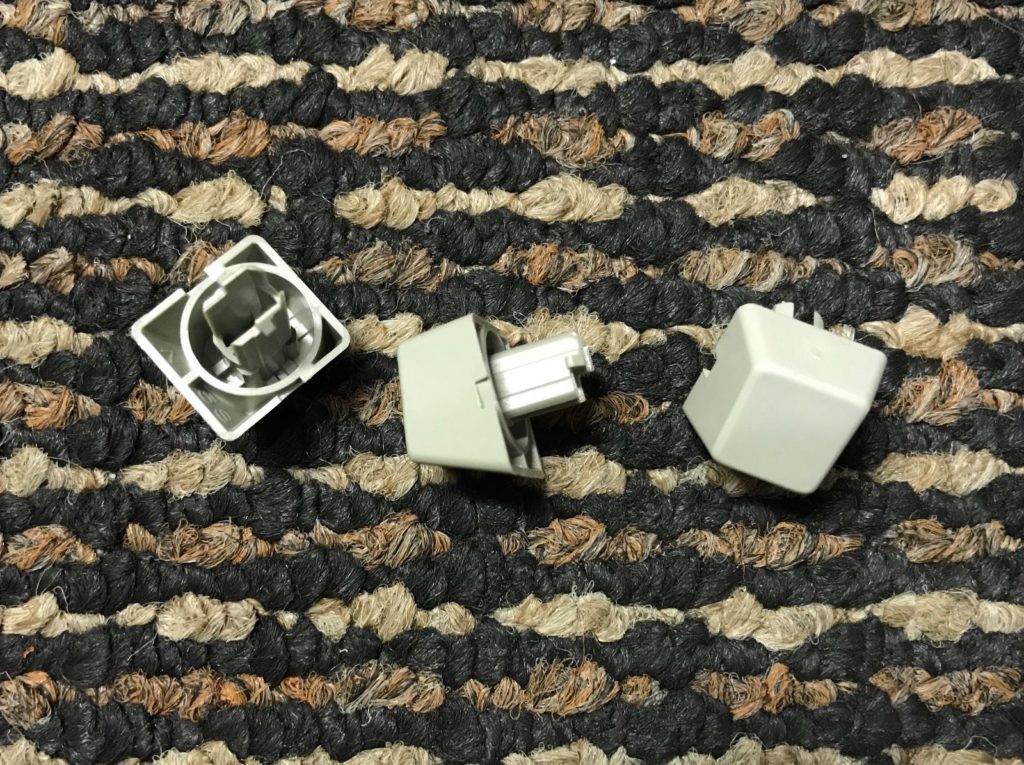
I found a guy on eBay that sold keyboard parts and ordered some. My thinking was that I’d attach the hammer and barrel parts to a custom ring and then attach the cast key into the actual keyboard part. Even if it wasn’t how I ended up going - and it wasn’t - it would give me a starting point and a working design to study.
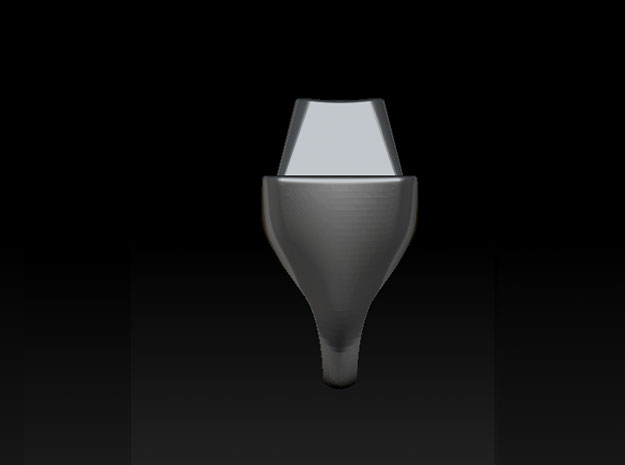
When the keyboard parts arrived, I got out my trusty digital calipers and measured each part every which way. I took all those measurements and re-created the design in Rhino3D (a 3D design program). I discovered that while Frankensteining a ring like this might work, it would look about as pretty as the eponymous monster. For one thing the key sat very high and the hammer and barrel were much wider than I had planned.
-
- Top
-
- Side Profile
-
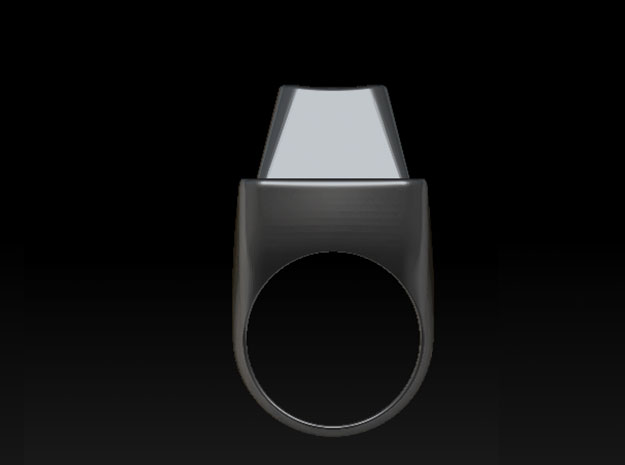
- Front Profile
-

- 3/4 Profile
Not one to give up, I sawed one of the keyboard mechanisms to make it narrower and make the key sit lower. But the more I altered the original mechanism the more I decided that this approach wouldn’t be feasible. I wanted to make a quality ring and bits of sawed off plastic hidden by sterling silver didn’t scream quality. I’d have to design my own keyboard mechanism. I was going to come up with something that IBM probably had a team of engineers working on for months. Next time you look at a keyboard really think about just how much thought went into it.
I wasn’t completely in the dark. The IBM keyboard mechanism inspired many different approaches. I liked the barrel concept since it gave the design a platform for stability. How would I adapt that design into something that would work in cast silver? How would I get everything to snap into place and hold together under the tension of a spring? What kind of spring would I use? I didn’t want a key that didn’t feel like a keyboard key when it was pressed. Metal also doesn’t have the same physical properties as plastic — it would behave slightly differently when all the parts were assembled.
This project presented interesting and challenging problems to solve. I was having a lot of fun.
-
- Version. 2.5

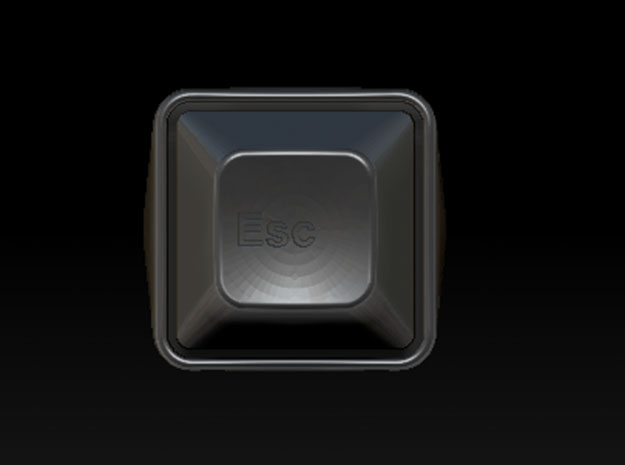
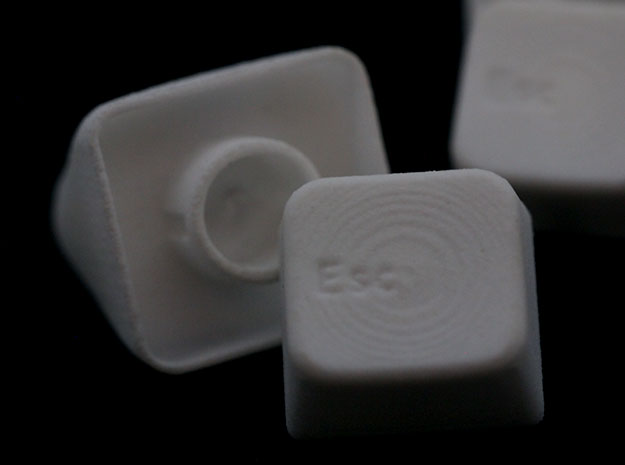
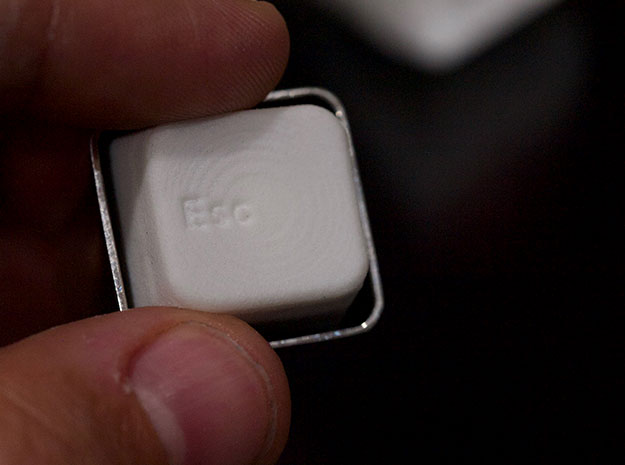
While all this was going on I also had to come up with the ring itself. My customer had sent me some photos and I also had the CAD models of my other keyboard rings. In the end, the ring and the “Esc key” were not that hard to design. The only real thing I really had to keep in mind was the example photo, the ring size, and how I wanted the Esc key to look. It got trickier when I had to figure out how much play up and down I wanted on the key. The play would depend not only on the internal mechanism but also the the walls of the key. I needed to get a prototype made.
I took my first crack at a keyboard mechanism, then another, and another until I came up with something I thought would work. I sent that model over to a service bureau to get it 3D printed in SLS nylon. Nylon is a good prototyping material because it’s inexpensive and the tolerances are fairly close to those of cast metals. A week or two later I got the printed model back.
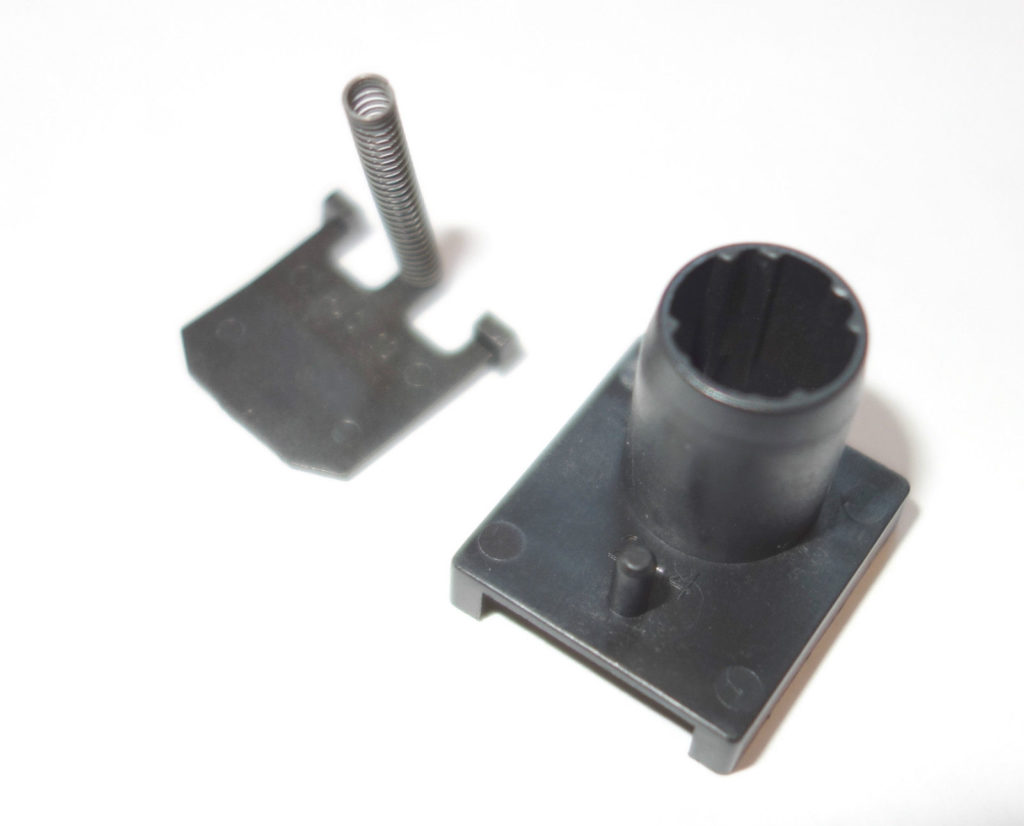
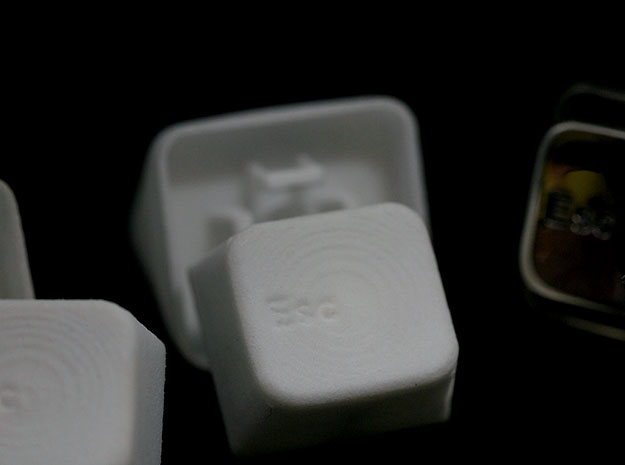
While waiting for the nylon print to arrive I collected a number of springs of various lengths, diameters, and springiness. When the print arrived I immediately started putting the whole thing together. It sort of worked and sort of didn’t. With a weak spring the ring would function but it felt sort of limp. With a stronger spring the mechanism would rock and the key would tilt. I had inadvertently made a single axis inside the key, an improper designed. It only had locking tabs on two sides, similar to the IBM design. The difference being the strength of the spring and that the barrel had runners along the inside that seated the key nicely into the barrel and gave it a track to run up and down on. My design didn’t have that because I couldn’t cast details that fine.
Back on Rhino I decided to flip my design upside down, put two more locking tabs, and added a guidance barrel that housed the spring - this part served as a track for a barrel on the key and the ring. I ordered the nylon print and after about a week it showed up . . . and worked exactly as expected!
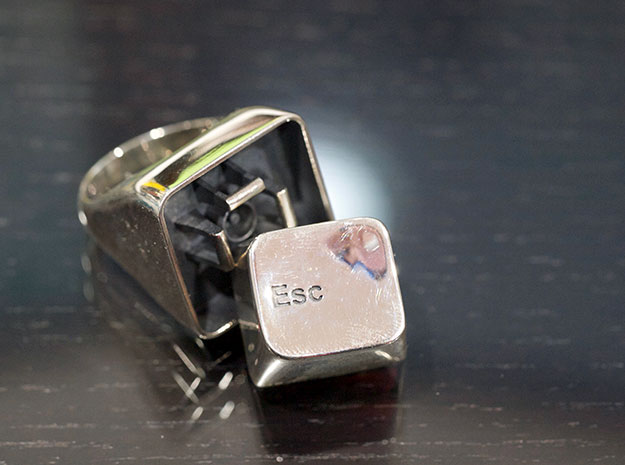
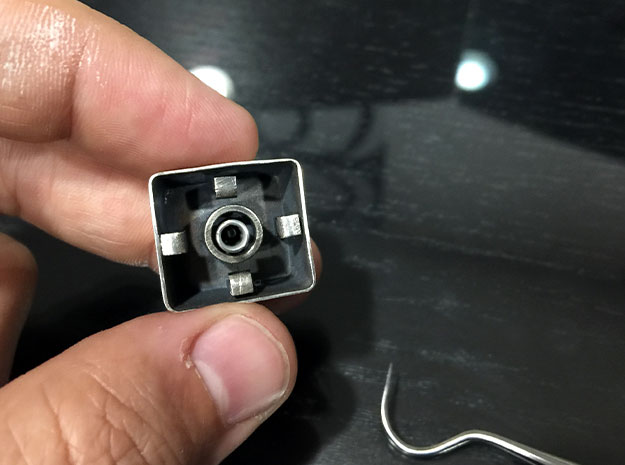
Being nylon, it didn’t function exactly as it would for metal but I knew ultimately this design would be function well. Why? Because I planned on using the key itself as a stressed member of the design. There were four locking tabs located around the barrel and close to the sides of the key. Around the barrel were four slots. The tabs snap into the slots and by slightly bending the sides of the key the tabs are forced to bend and bite into the slots!
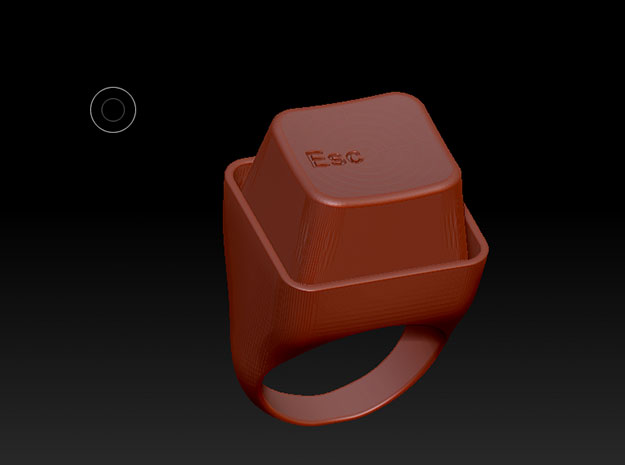
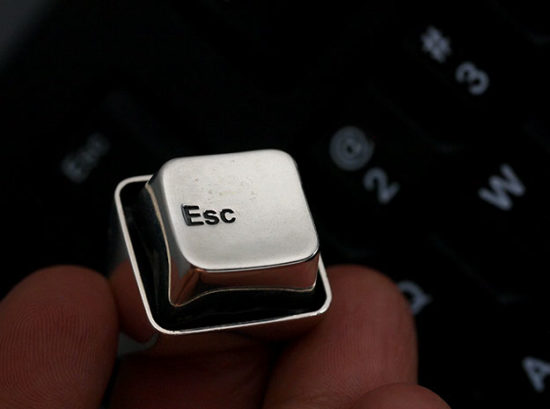
When the silver key came back from the casting house I put the goldilocks spring in the ring and snapped everything together. I tested it to make sure it worked and then pushed the sides of the key in slightly and as expected, it locked the tabs into place and the ring was complete.
-
- 01. Version One in SLS Nylon
-
- 02. Penultimate Version in SLS Nylon
-
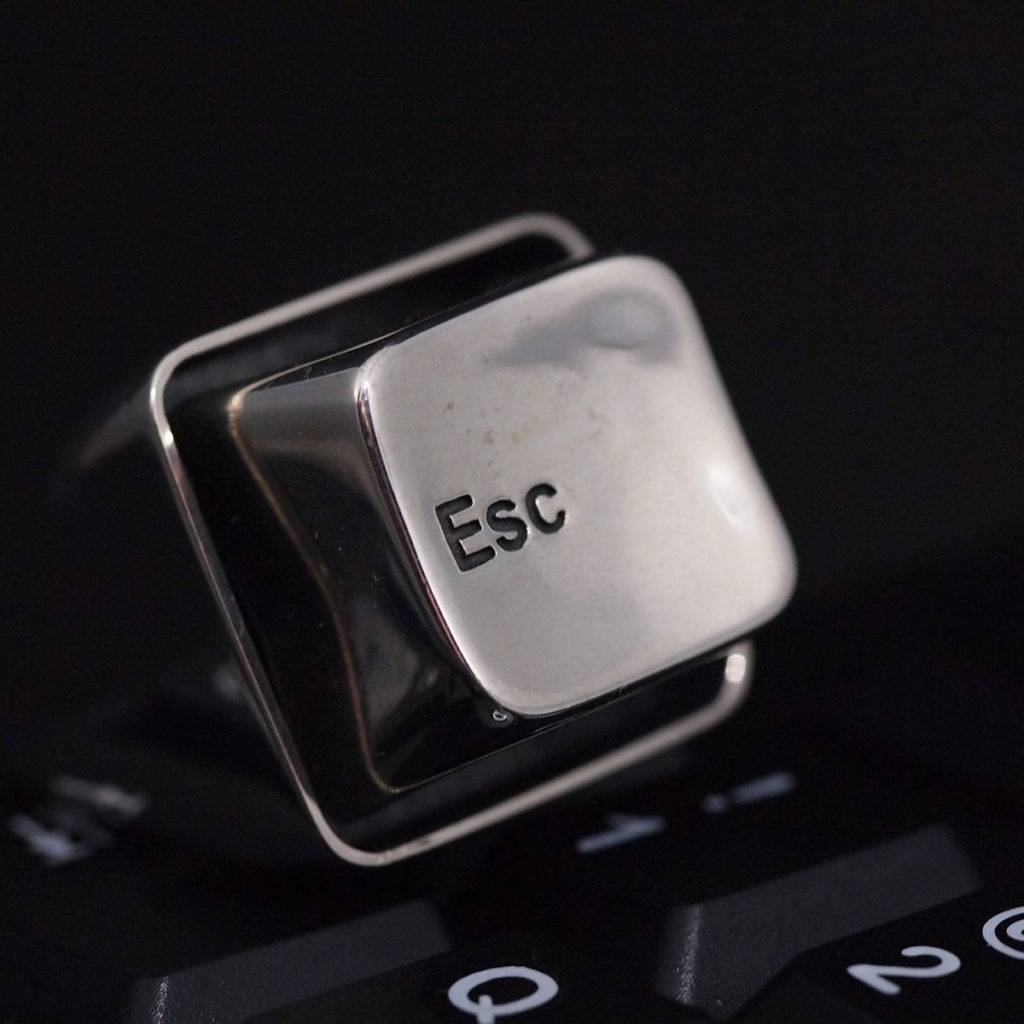
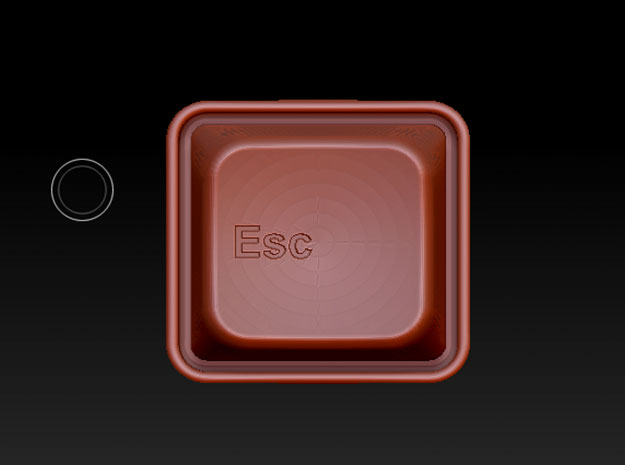
- 03. .925 Sterling Final Cast with Patina
-

- 04. Underside of ESC
-
- 05. Testing Springs
-

- 06. Final Spring
-
- 07. Nylon Test in Silver
-
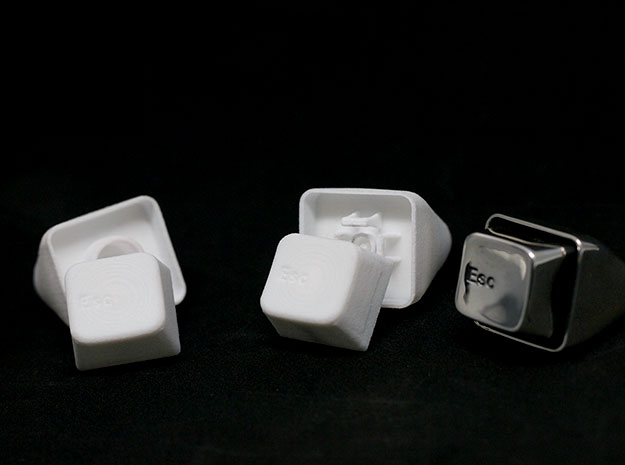
- 08. Various Versions
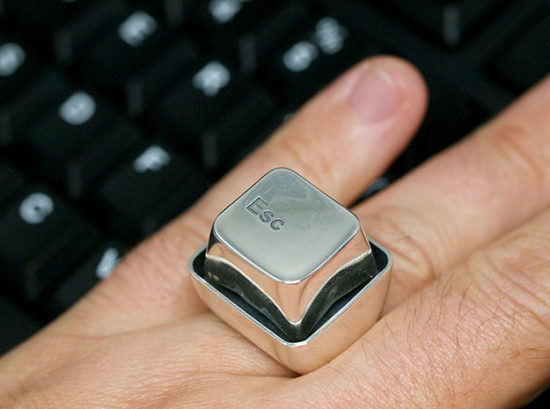
A perfectly functional Esc key ring in cast silver.

Comments are closed.